Open Monday-Friday 8 to 5

Filter Sort
close
3889 - 3924 of 6456
*STILTS ONLY; CIH2150, 12 & 16ROW 30"

*STILTS ONLY; CIH2150, 12 & 16ROW 30"

500 LP-CIH2150-12/16

View Details
*STILTS ONLY; CIH2150, 24ROW 30"

*STILTS ONLY; CIH2150, 24ROW 30"

500 LP-CIH2150-24

View Details
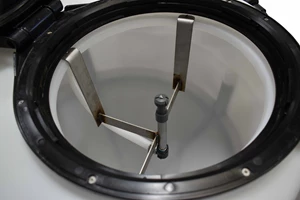
*CHEMBLADE KIT FOR MIC60V3-4

*CHEMBLADE KIT FOR MIC60V3-4

500 MIC-CHEMBLADE
View Details
*JUGRINSE KIT FOR MIC60V3-4

*JUGRINSE KIT FOR MIC60V3-4

500 MIC-JUGRINSE
View Details
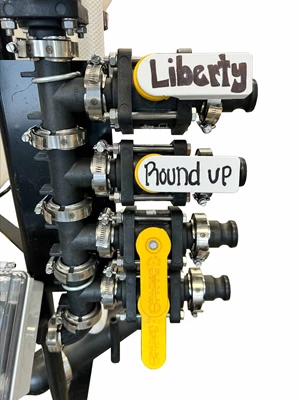
**1" VALVE HANDLE COVER

**1" VALVE HANDLE COVER

500 MIC-VALVE COVER
View Details
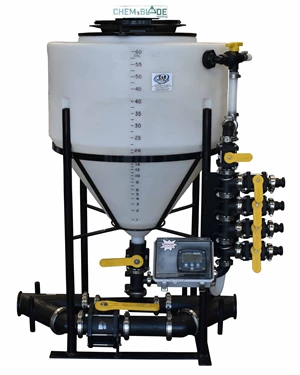
*M.I.C; 60 GAL X 2" VENTURI, 4 PRODUCT

*M.I.C; 60 GAL X 2" VENTURI, 4 PRODUCT

500 MIC60V2-4
*M.I.C; 60 GAL X 2" VENTURI, 4 PRODUCT
View Details
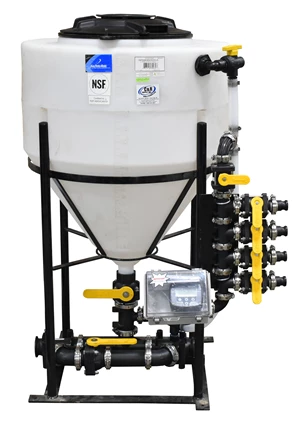
*M.I.C; 60 GAL X 3" VENTURI, 4 PRODUCT

*M.I.C; 60 GAL X 3" VENTURI, 4 PRODUCT

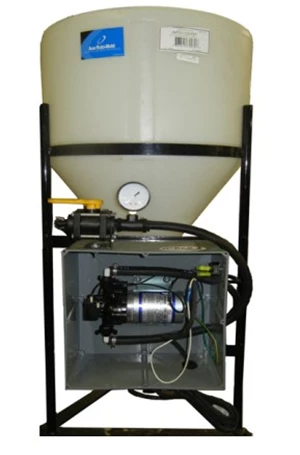
500 MIC60V3-4
The Multi-Product Induction cone enables you to never use a 12V chemical pump again. MIC utilizes an oval gear meter that is factory calibrated and doesn't need to be calibrated between products.  Installs on the pressure side of your pump so you will never have chemical going through your pump.  Reduces chemical exposure and eliminates chemical cross contamination.  60 gallon total drain cone tank with a lockable hinged lid.  Induct up to 4 products through the meter at a flow rate up to 20 GPM. 
View Details
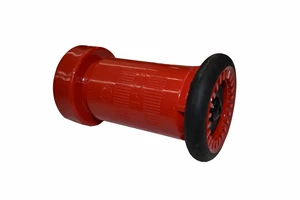
*FIRE NOZZLE; 1-1/2" FPT

*FIRE NOZZLE; 1-1/2" FPT

500 NT15B

View Details
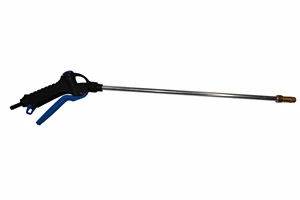
SPRAY GUN 1800#

SPRAY GUN 1800#

500 PTC910

View Details
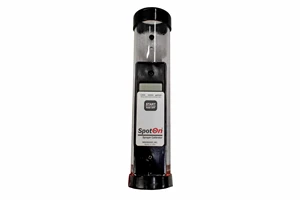
*SPRAY CALIBRATOR, 0-1.0 GPM

*SPRAY CALIBRATOR, 0-1.0 GPM

500 SC1

View Details
**15 GAL IMPREGNATION UNIT

**15 GAL IMPREGNATION UNIT

500 SFP15

View Details
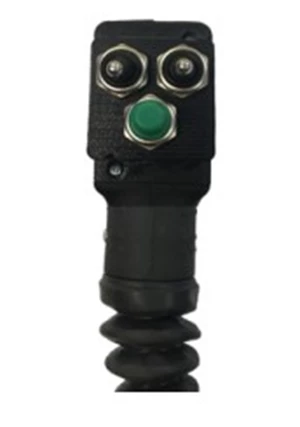
SPRAY GUN; PISTON GRIP #18

SPRAY GUN; PISTON GRIP #18

500 SG2218
View Details
*JOYSTICK; 1-PUMP, 2-ON/OFF

*JOYSTICK; 1-PUMP, 2-ON/OFF

500 SI-JOYSTICK

View Details
*100 GAL SLIDE-IN BASE SPRAYER

*100 GAL SLIDE-IN BASE SPRAYER

500 SI100

This unit comes with a powder coated frame and a 100 gallon pest control tank. Also included in this package is an H30A handgun with adjustable nozzle, Shurflo 5 gpm pump, manual on/off control and pressure control with plumbing. This unit can be setup with the Boomless option or up to a 21 ft boom. Frame dimensions: 40"W x 54"L Options: 500 SIBB-Boomless Nozzle option Boom options (see page 25 of the C&R Parts Catalog)
View Details
*100GAL SLIDE-IN SPRAYER W/ELEC CONTROLS

*100GAL SLIDE-IN SPRAYER W/ELEC CONTROLS

500 SI100-E

View Details
*40 GAL SLIDE-IN W/BOOMLESS NOZZLES

*40 GAL SLIDE-IN W/BOOMLESS NOZZLES

500 SI40BB

Economical unit comes with a powder coated frame and a 40 gallon tank with drain. Left and right electric controls with wiring harness are standard  Shurflo 4 gpm bypass pump.  Available with boomless option that sprays up to 30' total width or up to an 18' boom. Also comes with an 8 inch handgun with adjustable tip for hand spraying. Dimensions: 24"W x 36"L x 26"H
View Details
*50 GAL SLIDE-IN BASE SPRAYER

*50 GAL SLIDE-IN BASE SPRAYER

500 SI50
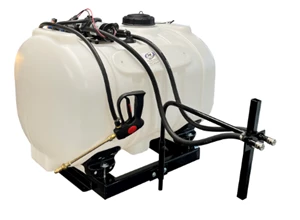
This unit comes with a powder coated frame and a 50 gallon pest control tank. Also included in this package is an H30A handgun with adjustable nozzle, Shurflo 5 gpm pump, manual on/off control and pressure control with plumbing. This unit can be setup with the Boomless option or up to a 21 ft boom. Frame dimensions: 40"W x 54"L Options: 500 SIBB - Boomless Nozzle option Boom options  (see page 23 of the C&R Parts Catalog)
View Details
*60 GAL SLIDE-IN W/BOOMLESS NOZZLES

*60 GAL SLIDE-IN W/BOOMLESS NOZZLES

500 SI60BB

Economical unit comes with a powder coated frame and a 60 gallon tank with drain. Left and right electric controls with wiring harness are standard. Shurflo 4 gpm bypass pump. Available with boomless option that sprays up to 30' total width or up to an 18' boom. Also comes with an 8 inch handgun with adjustable tip for hand spraying. Dimensions: 24"W x 36"L x 26"H
View Details
*DB-60 BRACKET/500 ELIP.  (2011-2013)

*DB-60 BRACKET/500 ELIP. (2011-2013)

500 SS-DB60TBX

View Details
*DB-60 BRKT 600750 GAL. ELLIP. ALL YEARS

*DB-60 BRKT 600750 GAL. ELLIP. ALL YEARS

500 SS-DB60TBX750

View Details
*JD1760/65-12ROW BRKT/2-200 ELIP.TANKS

*JD1760/65-12ROW BRKT/2-200 ELIP.TANKS

500 SS-JD1760/65WF

View Details
*JD1770/75NT-16R BRKT/400-500 ELIP

*JD1770/75NT-16R BRKT/400-500 ELIP

500 SS-JD1770/75NT-16

View Details
*JD1770/75NT-24R BRKT/400-500 GAL. ELIP

*JD1770/75NT-24R BRKT/400-500 GAL. ELIP

500 SS-JD1770/75NT-24

View Details
*JD1770/75NT-24R BRKT/ 600 GAL TANK

*JD1770/75NT-24R BRKT/ 600 GAL TANK

500 SS-JD1770/75NT-24 / 600GAL

View Details
*JD1790/95-16R OR 24R BRACKET

*JD1790/95-16R OR 24R BRACKET

500 SS-JD1790-16/24

View Details
*KINZE 4900-24BRKT/600 GAL. ELIP. TANK

*KINZE 4900-24BRKT/600 GAL. ELIP. TANK

500 SS-KINZE4900-24

View Details
*WHITE85/9500-16/24 BRACKETS/2-300 ELIP.

*WHITE85/9500-16/24 BRACKETS/2-300 ELIP.

500 SS-WHITE8500-16/24

View Details
*PRESERVATIVE APPLICATOR, 25GAL

*PRESERVATIVE APPLICATOR, 25GAL

500 SS025H

25 Gallon Preservative Applicator for Hay and silage equipment. Applicator Flier Liquid applicators are designed for use on balers, baggers and other equipment to apply liquid inoculants and preservatives. These applicators are versatile to cover many different crops and application rates and are easily mounted on most equipment.
View Details
**TRAILER; TRIPPLE CONE-LESS TANKS

**TRAILER; TRIPPLE CONE-LESS TANKS

500 TRAILER-TC9000

View Details
**FINGER TUBE;7000/7100JD+2000 KINZE

**FINGER TUBE;7000/7100JD+2000 KINZE

500 TT001

John Deere and Kinze Starter Fertilizer Placement Tube Part #TT-001 This simple yet effective design is totally protected by the disc blades, so rocks should not be an issue. The 1/8" wall 3/8" stainless tube will easily outlast the disc scraper. The optional seed bounce flap closes the opening between the disc openers assuring correct seed placement by eliminating seed bounce and ricochet. Key Benefits Starter Fertilizer application deeper in the soil profile Instant root uptake for early plant health Maintenance free Installation Instructions: 1. Remove depth gauge wheels and disc's, taking note of shim placement 2. Remove factory seed tube guard remove disc guard bolt on the right side of the row unit (standing behind) 3. Lift TT-001 up into position on row unit 4. Align roll pin holes and install new roll pins (supplied) 5. Re-Install seed tube 6. Re-Install disc openers taking care to get the correct shim placement 7. Re-Install depth gauge wheels Recommend replacing disc openers when you put our fertilizer tubes on.
View Details
**TT001 TUBE W/ OVER-SIZED ROLL PINS

**TT001 TUBE W/ OVER-SIZED ROLL PINS

500 TT001-OS

John Deere and Kinze Starter Fertilizer Placement Tube Part #TT-001 Oversized If your roll pin holes for your seed tube guard on your planter show wear your seed tube guard will not fit snug. We suggest this product. The roll pin holes are enlarged to 13/32 in. This will allow the seed tube guard and attached fertilizer tube to hold fast and snug to your row unit. This simple yet effective design is totally protected by the disc blades, so rocks should not be an issue. The 1/8" wall 3/8" stainless tube will easily outlast the disc scraper. The optional seed bounce flap closes the opening between the disc openers assuring correct seed placement by eliminating seed bounce and ricochet. Key Benefits Starter Fertilizer application deeper in the soil profile Instant root uptake for early plant health Maintenance free Installation Instructions: 1. Remove depth gauge wheels and disc's, taking note of shim placement 2. Remove factory seed tube guard remove disc guard bolt on the right side of the row unit (standing behind) 3. Lift TT-001 up into position on row unit 4. Align roll pin holes and install new roll pins (supplied) 5. Re-Install seed tube 6. Re-Install disc openers taking care to get the correct shim placement 7. Re-Install depth gauge wheels Recommend replacing disc openers when you put our fertilizer tubes on.
View Details
**ROW UNIT; 1700/7200/7300 NON-XP

**ROW UNIT; 1700/7200/7300 NON-XP

500 TT002

View Details
**TT002 TUBE W/ OVERSIZED ROLL PINS

**TT002 TUBE W/ OVERSIZED ROLL PINS

500 TT002-OS

John Deere and Kinze Starter Fertilizer Placement Tube Part #TT-001 Oversized If your roll pin holes for your seed tube guard on your planter show wear your seed tube guard will not fit snug. We suggest this product. The roll pin holes are enlarged to 13/32 in. This will allow the seed tube guard and attached fertilizer tube to hold fast and snug to your row unit. This simple yet effective design is totally protected by the disc blades, so rocks should not be an issue. The 1/8" wall 3/8" stainless tube will easily outlast the disc scraper. The optional seed bounce flap closes the opening between the disc openers assuring correct seed placement by eliminating seed bounce and ricochet. Key Benefits Starter Fertilizer application deeper in the soil profile Instant root uptake for early plant health Maintenance free Installation Instructions: 1. Remove depth gauge wheels and disc's, taking note of shim placement 2. Remove factory seed tube guard remove disc guard bolt on the right side of the row unit (standing behind) 3. Lift TT-001 up into position on row unit 4. Align roll pin holes and install new roll pins (supplied) 5. Re-Install seed tube 6. Re-Install disc openers taking care to get the correct shim placement 7. Re-Install depth gauge wheels Recommend replacing disc openers when you put our fertilizer tubes on.
View Details
**FINGER TUBE; JD MAX EMERGE 5 SERIES

**FINGER TUBE; JD MAX EMERGE 5 SERIES

500 TT007

John Deere Starter Fertilizer Placement Tube Part #TT-007 This simple yet effective design is totally protected by the disc blades, so rocks should not be an issue. The 1/8" wall 3/8" stainless tube will easily outlast the disc scraper. The optional seed bounce flap closes the opening between the disc openers assuring correct seed placement by eliminating seed bounce and ricochet. Key Benefits • Starter Fertilizer application deeper in the soil profile • Instant root uptake for early plant health • Maintenance free Installation Instructions: 1. Remove depth Guage wheels and disc openers, making sure to note correct shim placement. 2. Remove stock seed tube guard. 3. Install new Totally Tubular part TT007. 4. Bend centering tab against row shank. The picture above shows the tab before it is bent against the shank. Tap centering tab with mallet to firmly hold tube centered. 5. Reinstall disc openers, making sure you have correct shim placement. Recommend replacing disc openers when you put our fertilizer tubes on. Â
View Details
**SEED BOUNCE FLAP; FINGER TUBE

**SEED BOUNCE FLAP; FINGER TUBE

500 TT008

Part #TT-008 This rubber flap installs into the seed tube for simple control of seed bounce. The optional seed bounce flap closes the opening between the disc openers assuring correct seed placement by eliminating seed bounce and ricochet. This ensures the seed is getting into the seed trench and not on top of the ground. It also helps in the plantability of light seeds such as sugar beets and protects them from the "floating effect" when traveling down wind.  This product works with the Precision Seed Tube, however the roll pin will need to be cut down, and the flap itself has to be cut down lengthwise to fit into the smaller opening of this seed tube.  This product will not work with the Bullseye Seed Tube. Installation Instructions: Drill a 1/8" hole through seed tube using supplied template. It is very important that this hole is drilled straight, so removing the seed tube and using a drill press is recommended Insert the seed bounce flap pin into one of the above holes and twist seed bounce flap up into position, snapping the other side of the roll pin into the adjacent hole Re-Install seed tube
View Details
**JD EXACT EMERGE FERT TUBE

**JD EXACT EMERGE FERT TUBE

500 TT009

John Deere ExactEmerge Planter Totally Tubular field tested 3 ExactEmerge planters with our fertilizer tubes running different rates of fertilizer, at different rates of speed. Each test was successful in the following ways: 1. Fertilizer was successfully placed in the trench, below the seed. 2. Fertilizer was not building up on the brush system, nor brought back into the seed delivery system. 3. Fertilizer was successfully placed at various rates of speed, with various rates of fertilizer. Recommendations:  1. Check valves should be run with these fertilizer tubes; close to the tube, in the fertilizer line. 2. Try not to let the planter sit in the ground too long where a pool of fertilizer can form and possibly get onto the brush seed delivery system. 3. Inspect row units for build-up in the brush system when you fill your planter. Installation Instructions: These Instructions need to be followed very closely. Please read thoroughly!!! 1. Remove gauge wheels and disc blades. Remove all shims on right side. 2. Remove nut holding on the disc guard. 3. Slide ExactEmerge Fertilizer tube over disc bolt as shown. This bracket takes the place of two (2) shims. It is the exact width of two (2) shims. 4. Slide bracket on the top of the tube over the disc guard bolt as shown. 5. Tighten the disc guard nut back into place. 6. Align the tube so it is in the center of the seed tube guard and pinch the tab tightly around the guard with a channel lock. (We find a channel lock works the best.) 7. Replace all but two (2) of the shims next to the bracket. 8. The 6mm plastic line is optional. It is provided for additional pressure out of the bottom of the tube. This tube can be inserted up the bottom of the tube, leaving 1/4" sticking out of the bottom. Please inspect daily. Please note : This line may or may not need to be used. In some very dry conditions, this line may melt due to friction; if this happens, remove the plastic 6mm line.
View Details
3889 - 3924 of 6456